Shoemaking School Pt 5 — Finishing
I was going to initially combine the outsole portion and finishing, but it was getting a bit too long so I broke it off. Consider this a continuation of the previous one, where you start with a shoe with a closed channel but no finishing done.

First order of business is shaping the outsole. Use a glass as described in the previous segment to ensure that the outsole and welt is completely parallel with the shape of the shoe and it is a nice, crisp, 90 degree angle. Try a few different edges when first using a piece of glass, you’ll see pretty quickly which edge to use as it will take off a bunch immediately. If you use up a piece of glass completely, use a file to make a notch, put it up against a corner of a hard surface, and snap it to make a new edge. Use a straight edge where possible, it will help keep your outsole corner straight.

Next, bevel the bottom corners of your outsole, you can use a piece of glass and sandpaper here.

Go over your welt again with a fudging wheel, making sure you set it properly in the grooves first. This part is tricky and can mess up the aesthetics of the welt if you’re not careful. Don’t use water on the welt before fudging here, but still heat up the wheel beforehand.

Add a bevel to your welt as well. I used a knife, but there are other tools as well for this.

This is an edging iron, which helps make your outsole edge uniform. This has two sides, line up beforehand to see which one fits the side of your outsole. Heat up the iron similar to the fudging wheel beforehand, and wet the edges of your sole slightly. Pass the iron along the edge with the thick middle portion facing up, then flip it and do the same thing with it facing down.

End result of the edging iron.

Next, go over your edges with a coarse grit sandpaper, I used 150 grit for the first pass. Make sure everything is nice, even, and smooth. Take out any nicks you see after the edging iron. If you see the outsole edge isn't quite perpendicular, now is another opportunity to correct or minimize that.

After sanding, apply dye to the edge, useful to hold your shoe sole side up when dyeing, that way you won’t get any dye leaking onto the bottom of the soles.

Next pass a cloth with a bit of ammonia over the edge, going in one direction. This cleans any glue residue that may be left and the ammonia shrinks the leather a bit closing up the fibers.

This is a homemade wooden edge burnishing tool, wet the edge slightly and go over it with the tool until its smooth and shiny. You can also use your bone folder for this, since its a hard and smooth surface.

Result of the burnishing tool, hard and smooth. Now is a good opportunity to note where your edge isn't quite even, you can pay more attention there on the next stage. Again, ignore the mangled uppers… Use tape when you’re actually making a pair of shoes to protect them.
I skipped a bunch of pictures, but the next stage is to do all of that again, but now use a finer sandpaper (320 grit). So, sand, dye the edges, apply ammonia, and burnish with the wooden tool. After all of that, use the edging iron again without wetting the edges beforehand. Finally, go over the edge again with a 400 grit sandpaper. The end result should be silky smooth and even.

Note, I made a slight bump when I was trimming the sole at the curve here, and didn’t spend enough time glassing and sanding it away. This is what you should be watching out for after you burnish so you can get rid of bumps like that. Next stage is to apply a liquid wax to the top of the welt and edge, then polish vigorously. You can apply additional coats of wax as needed.

After the wax sets (maybe 10 minutes), use the fudging wheel without warming it up again on the welt.

Use a piece of glass with the edge slightly rounded to take off the surface of the sole leather.

After the glass, use sandpaper to smooth everything out and take off anything that was missed with the glass.

Not sure what this is called in English, but its used to seal in the sole and protect it. It also gives it a nice glossy shine.

Apply a generous amount then take a cloth and polish the hell out of it.

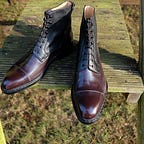
End result looks quite slick!

I am incredibly surprised how nice the fudging turned out. I screwed it up a few times, but with all of the repetition, you have a chance to repair it (or screw it up worse).
This article is also posted on my website, www.arnoshoes.com
If you want to see my latest projects, give my Instagram page a follow.